Corrugated metal roofing stands out for its resilience and cost-effectiveness. Its durability and ability to withstand various weather conditions make it a popular choice among homeowners. However, ensuring it performs efficiently for years depends on the installation process. Understanding how to install corrugated metal roofing correctly will help you maximize the longevity and efficiency of your roof, while preventing common issues like leaks or structural damage.
Whether you’re looking to tackle the installation yourself or hire professionals, this guide covers everything you need to know to ensure a successful project, from preparing your roof to fastening the metal panels securely. Let’s dive into the steps required for installing corrugated metal roofing and how to avoid critical mistakes.
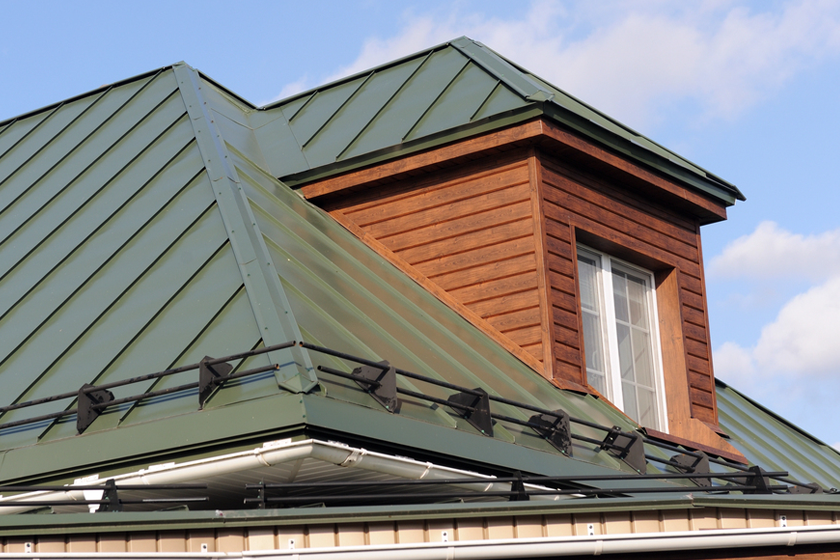
Understanding Corrugated Metal Roofing and Its Benefits
Before you begin the installation process, it’s important to understand why corrugated metal roofing is so highly regarded. Unlike other roofing materials, corrugated metal offers superior durability due to its distinct wavy or ribbed design. These corrugations add strength to the metal sheets, allowing them to withstand heavy rain, wind, and even hail. In regions that experience severe weather, corrugated metal roofs can significantly reduce the risk of damage and the need for costly roofing repair services.
In addition to being durable, corrugated metal is a versatile material. It can be made from different metals, including galvanized steel, aluminum, and Colorbond, giving homeowners flexibility in choosing their desired look and longevity. Moreover, metal roofs are highly energy efficient, reflecting heat in the summer and providing insulation during colder months, ultimately reducing energy bills. Knowing these benefits can help you appreciate why proper installation is key to fully realizing the advantages of corrugated metal roofing.
Step One: Preparing the Roof for Installation
Preparing the roof’s surface is the first step in installing corrugated metal roofing. Start by thoroughly inspecting the current roof structure to identify any damage, such as rotting wood, leaks, or weakened areas. This inspection is crucial because the metal panels need a stable base to ensure a smooth and secure installation. Address any issues before proceeding with the new installation to avoid potential complications.
Once you’ve repaired any damage, clear the roof of any debris or nails that could interfere with the installation process. A clean surface ensures the metal panels will lay flat and adhere properly. Neglecting this step can lead to gaps or uneven areas that could compromise the roof’s overall performance. After the surface is prepped, measure your roof to calculate how many corrugated panels you’ll need, accounting for the roof’s size and slope to ensure proper water drainage.
Step Two: Measuring and Layout
Accurate measurements are essential for a successful installation. Start by using a tape measure to determine the total surface area of your roof. This includes accounting for roof features such as chimneys, vents, or skylights, which will need special attention during installation. It’s important to purchase enough corrugated metal sheets to cover the roof, plus a little extra for trimming or unexpected adjustments.
As you plan your layout, consider the pitch of your roof. The slope of the roof influences how the metal panels will overlap, which is crucial for preventing water infiltration. Ensure that the layout allows for proper panel overlap (typically at least one corrugation) to create a watertight seal. Planning your layout thoroughly in advance will save time during the installation process and help avoid mistakes.
Step Three: Installing the Panels
Begin the installation by laying the first corrugated metal panel at the lower corner of the roof, aligning it so that it overhangs the roof edge slightly. This initial panel will set the foundation for the rest of the roof, so ensure it’s aligned properly by using a chalk line to keep the panel straight. Once in place, secure the panel with roofing screws. It’s important to place the screws at the top of the corrugations, rather than in the valleys, to prevent water from pooling around the fasteners.
Continue laying the subsequent panels, overlapping each by at least one corrugation. This overlap is vital for maintaining a watertight barrier. Be careful to align each panel precisely with the previous one to avoid gaps or inconsistencies. Secure each panel with screws at regular intervals, ensuring that they are tightly fastened but not overtightened, which can damage the metal.
Step Four: Trimming and Customizing Around Roof Features
Once you’ve installed the primary panels, you’ll need to trim and customize the metal sheets to fit around roof features such as chimneys, vents, or skylights. Measure these areas carefully and use metal shears or a circular saw with a metal-cutting blade to make precise cuts. Properly fitting the panels around these features is critical to maintaining the roof’s integrity and preventing leaks.
When dealing with roof penetrations, such as vents, use flashing to create a watertight seal around the opening. Apply a waterproof sealant where necessary to ensure that no moisture can seep through. This step not only enhances the durability of your roofing system but also protects the internal structure of your home from water damage.
Step Five: Installing the Ridge Cap
After all the panels have been secured and trimmed, the next step is installing the ridge cap along the roof’s peak. The ridge cap serves as the final layer of protection, covering the seam where the two sides of the roof meet and preventing water from entering the roof structure. Align the ridge cap carefully, ensuring that it overlaps both sides of the roof equally. Use screws to fasten the ridge cap in place, just as you did with the metal panels, and apply any necessary sealant to reinforce the seams.
This step completes the basic installation of your corrugated metal roofing, but it’s important to perform a thorough inspection afterward to ensure that all fasteners are secure, and there are no gaps or potential weak points.
Step Six: Performing a Final Inspection
Once the installation is complete, performing a final inspection is crucial to ensure the durability and efficiency of your corrugated metal roof. Start by checking all fasteners to ensure they are properly secured. Loose fasteners can result in shifting panels, which may lead to leaks or roof instability. Also, inspect the overlap of the panels to confirm that they are aligned correctly and provide adequate protection against water infiltration.
During the inspection, look for any signs of gaps or uneven areas in the roof. Even small gaps can compromise the roof’s integrity by allowing water to seep through, leading to issues like rust or damage to the underlying structure. If you find any areas that seem off, address them immediately by either tightening the screws or resealing joints as needed.
It’s also wise to check the flashing around any roof penetrations, such as chimneys, skylights, and vents. Make sure that the flashing is securely fastened and well-sealed with a waterproof sealant to prevent water from entering around these critical areas.
Common Mistakes to Avoid During Installation
Even though corrugated metal roofing is known for its durability, the installation process requires precision to ensure long-term efficiency. Avoiding common mistakes can save you from costly repairs or replacements down the line.
One common error is inaccurate measurements. Failing to measure correctly can lead to buying either too much or too little material, causing delays or adding unnecessary costs to the project. Always double-check your measurements before purchasing materials and starting the installation process.
Another frequent mistake is poor roof preparation. Installing metal panels on a roof that hasn’t been properly cleared of debris, nails, or old roofing materials can lead to gaps or misalignment. Ensure the roof is completely clean and any structural issues have been repaired before proceeding with installation.
It’s also critical to properly overlap the panels. The overlapping corrugation prevents water from penetrating the seams, so skimping on overlap can lead to leaks. Follow manufacturer guidelines on how much overlap is required for your specific roofing material to maintain a watertight installation.
Using incorrect fasteners or not fastening screws securely can compromise the entire roofing system. Always use the recommended screws for corrugated metal roofing and ensure they are placed at the peaks of the corrugations for optimal stability. Loose or improperly placed fasteners can lead to wind uplift or water penetration.
How to Ensure Longevity and Efficiency
Once your corrugated metal roofing is installed, regular maintenance will help ensure its longevity and continued efficiency. Corrugated metal roofs are relatively low maintenance, but it’s important to inspect your roof at least once a year and after major storms. Look for loose fasteners, rust, or any signs of damage that may have occurred due to weather conditions.
Cleaning your roof periodically is also recommended. Dirt, debris, and leaves can accumulate, especially in the valleys of the corrugations, potentially causing blockages or water buildup. Use a low-pressure hose to clean the roof without damaging the metal panels. Additionally, clear your gutters regularly to ensure proper drainage and avoid water from pooling on the roof’s surface.
If you notice any significant damage during your inspections, it’s best to seek metal roofing services from a professional to assess and repair the issue. Regular maintenance and timely repairs are key to maximizing the lifespan of your corrugated metal roof.
Our Expertise Will Ensure a Long-Lasting Roof
With over 15 years of experience in the roofing industry, we know how important proper installation and maintenance are for the longevity of your roof. Whether you need help with installation or roofing repair services, Monastery Roofing LLC is here to ensure your corrugated metal roof performs efficiently for years to come.